|
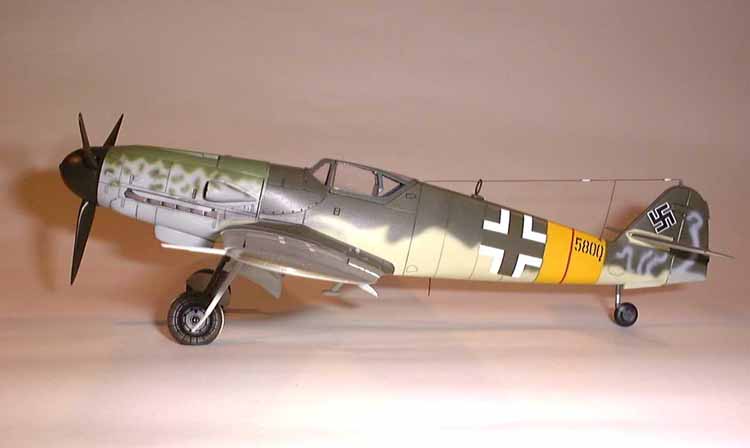
Here is the result
of my work, a Bf109 K-4 from Hasegawa, with the Kommandeur decals, so I am
writing a little article about it. This a/c is a Messerschmitt Bf 109 K-4
"5800" Wr.Nr Unknown, maybe 335800?,it could have been a Staffel
Fure's a/c from I/JG11,the a/c was found at Munchen-Reim in May 1945.
I chose this scheme
because it was a bit different than the normal K-4,with a mix of colors like RLM
76,81,82,83,84 and a light gray for the underwing, and the large yellow band on
the fuselage. I decided to use the magnificent Adeco set from my friend
Vincent Kermorgan, and i did not regret it at all. The resin kit is the
best on the market, in terms of fitting absolutely! No work is required to
fit the resin kit into the a/c - you just have to replace the kit parts with the
resin ones and paint it, and that's it, there's nothing missing in this very
nice interior.
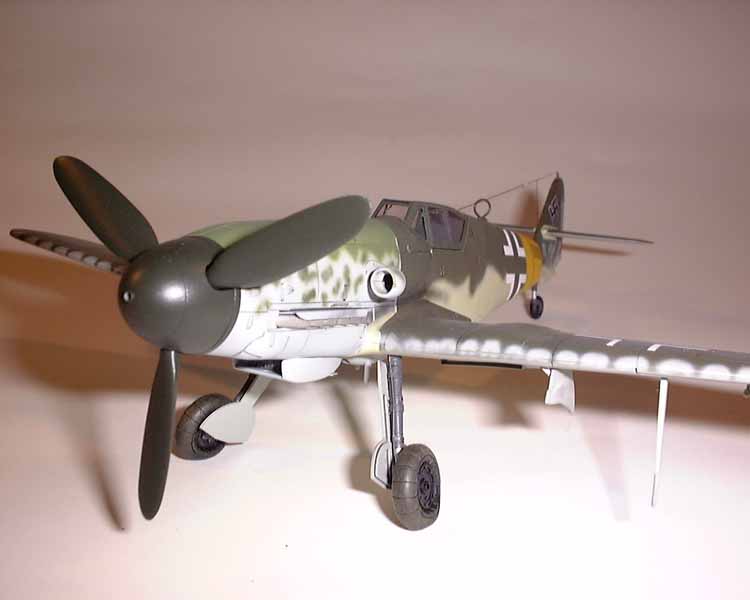
I used as well an
Eduard PE set for the K-4,where there is lot of details to add to the kit. I
engraved the panel lines and opened the wheel wells to give some more accuracy to
my K-4, although this kit looks very accurate to me already!!!! The
fitting of this kit is just perfect, so I just used the sequence, starting with
the interior, fuselage, and then the wings. This is a" Putty Free"
kit, the only extra details were the brake lines on the landings gears, and I
forgot to mention a pair of True Details wheels (Thank you Milo!!).
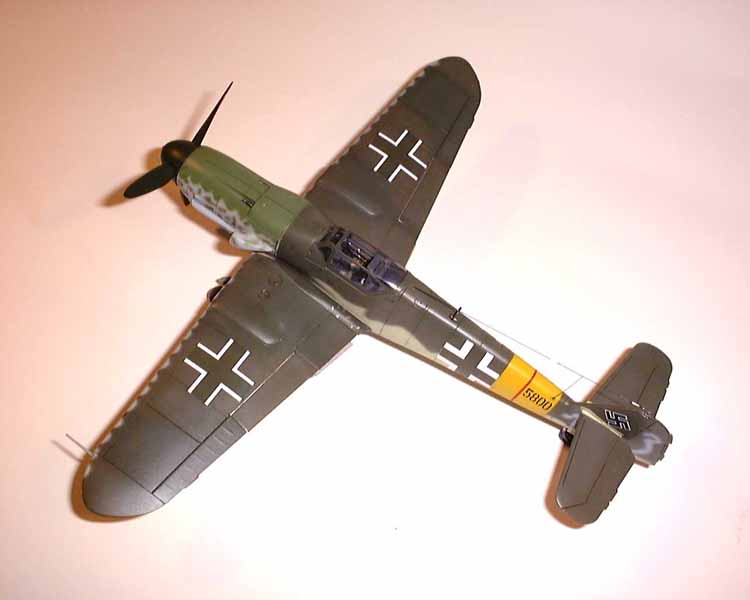
As for the painting,
the entire model was sprayed with SnJ and then buffed, then I
sprayed the RLM 84(Gunze H-74) on the entire fuselage, masked and sprayed
the gray, (the best match to me was IJA gray (Gunze H-60),for the underwing) ,then the
RLM76 for the engine cowling (Gunze 416). Next, I
masked and
sprayed the RLM 81 and the RLM 83 camo pattern, then remasked the fuselage and
sprayed, this time using RLM 82 with a RLM 83 mottling (OK- still following
me???)
Apparently this a/c as been reworked, that's why you have some parts of the a/c
with different colors. For the details, like wheel wells I decided to
leave them NMF, with RLM 66 landing gears.
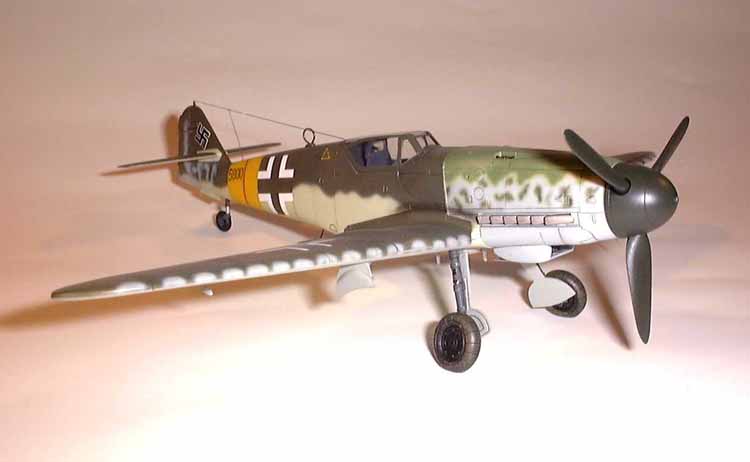
When the complete
a/c was painted, I sprayed a coat of Tamiya X-22 clear gloss, then I applied
a wash of black enamels on the panels lines. Now, it was time for
decaling. I used the brilliant decals From Kommandeur, and again it was a
real pleasure to use. The decals went on with no problems with a little setting
solution.
At the end, I glued all the details such as antennas, wires, pitot tube
etc. The resin wheels had been glued with 5 min. epoxy, to have solid
bonding, (and by the way, that was the same for the resin interior). Then
the entire model was sprayed with a mix of 7/3 Tamiya gloss and Tamiya Flat
base, and finally the result is what you see in these pictures. I am very
happy with this model -it was a real pleasure to do, especially since it was the
109, which is one of my favorite a/c.
So folks, I
think that's it for this one, but don't worry - there will be more 109s from me
because I do have another 18 from the shelves to be made!!!!!! I would
like to especially thank Brown Ryle from Kommandeur decals for his help, and
Vincent Kermorgan for his very good knowledge on the 109,and the German expert
Bernd for his help on this project as well.
Thank you all, and all the best -
Franck
|
|