|
Hello everyone!
Here's my new 1:72 P-51-D Mustang from Academy.
The Plane:
Designed in only 90 days, the Mustang resulted from
a British requirement and first flew with the Allison V-1710 engine, and later
switched to the Packard Merlin, the american built version of the Rolls-Royce
Merlin. This literally gave a whole new lease of life to the previously
mediocre Mustang. The Mustang was easily the finest all-rounder in the war.
The P-51-D incorporated a cut down rear fuselage,
which conferred an excellent field of view all around. Later models
incorporated increases in internal fuel tankage, as well as better weapons
outfit.
Rocket projectiles and bombs were fitted for
assisting the ground war. The Mustang production totalled 15,386 at the end of
the war.
The Kit:
The kit is moulded in light gray. No visible sink
holes, no flash. Finely engraved panel lines and good rivet details are quite
common in all new Academy kits, and the Mustang is no exception. It has a four
piece clear frame, with the canopy front, two versions of the canopy and the
rear-view mirror for the canopy.
|
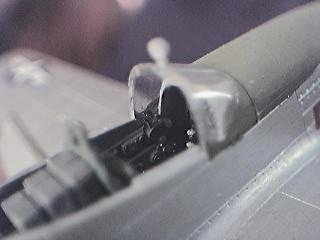
The cockpit was quite a treat for this
scale of airplane. It is a very intricate construction with
a lot of parts. It even had a separate throttle quadrant and lever!
The front console is very neat, with raised instrument detail.a
decal is provided, but I doubt anyone will want to use it. The
instruments on the left and right hand panels are moulded
along with the fuselage halves. Behind the seat are a complex set of
boxes, beautifully moulded. (What are they anyway? radio..? Let me
know, someone).
This done, i glued the fuselage halves
together. This whole assembly went off well. The fit is decent.
|
|
| Next came the wings. There
were no major problems here; just remember to sand the leading edge to
get rid of glue marks if any. That makes a lot of difference. And the
feather in the cap is that it has a option for keeping the flaps down
or in the retracted position! |
|
The guns are moulded in a funny manner. The
barrels are moulded in halves in each half of the wing. You chaps out
there could use a fine drill to bore out a hole for the barrel. Its no
problem, since its hollow. Even poking a pin through the barrel halevs, before
gluing the wing halves together would make a lot of difference. The
holes for the pylon attachment have to be drilled out from the inside. The gun
shell-ejection ports have already been cut out for you to heave a sigh of
relief!
The wings go in well, and have to be slid into the
gap between the fuselage and the ventral inlet.
That done, the elevators went on next.
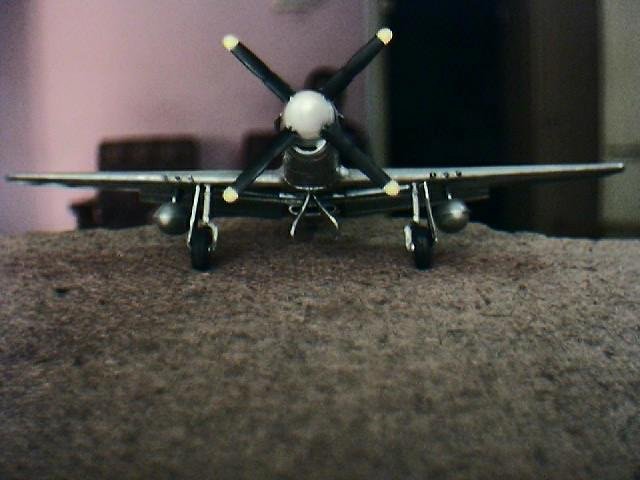
Probably the best part in the whole kit is the assembly ffor the propeller.
This assembly is independent of the fuselage constuction. The very tip of the
nose including the inlet is where the prop sits.
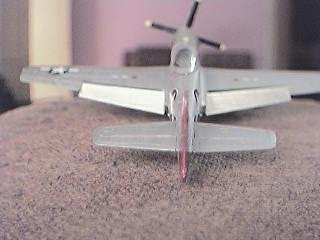
| Next, the painting. I used
Apcolite domestic house paints Aluminium. I hand painted it to get a
decent share of the streaks on the plane. As for the nose patch, I
used Humbrol 86 olive drab, though the instructions say dark green.
The rudder was painted using Tamiya gloss red( forgot the number. goes
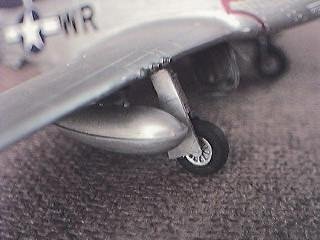
something like X24, I think) I then mounted the landing gears,
which had a good set of wheels. The tires are not weighted, but wheels
have good detail. |
|
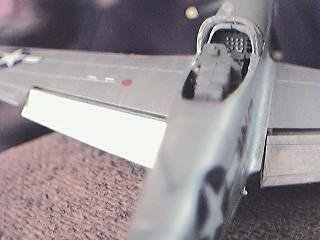
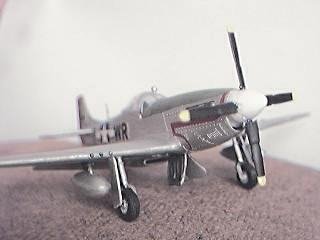
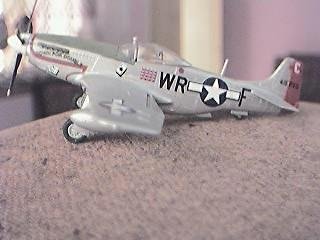
"Down For Double" makes for a very good
and colourful decal. It is in the colours of Lt. Col. C.M.Graham.
 |
 |
|
"Down For
Double" makes for a very good and colourful decal. It is in the
colours of Lt. Col. C.M.Graham. |
This is a very tricky placement, mind you. Also,
be careful with the USAAF logo decals, mine cracked while applying. Spraying
clear varnish over the decal sheet should help.
|
The rest of the decals are good, and sit
well on the gloss silver. There are no weapons given, but there are
options for either 110 or 75 gallon tanks. This done, I lastly
mounted the propeller assembly. Now you know why its a blessing in
disguise!
|
|
The cheapest kit I've ever built. Cost me
140 rupees (= approx. 3 USD at the present rates.) Moulded 1993.
Again, before I end, I must congratulate Academy
for their excellent Instruction Manual.
See you folks, and don't miss out on this one!
Take care!
Sushanth
|
|