|
PRESENTATION
Commercial
aviation is relatively seldom dealt with in our hobby. For instance my personal
interest in jetliners is at least as high as my interest in jetfighters. But
this doesn't quite show in my kit collection.
During
the last few years there has been a huge renewal around commercial aircraft
modeling with Minicraft and Revell releasing new kits and Skyline, Liveries
Unlimited, Avigraphics, Flying Colors and Airways Graphics to name but a few
providing us a bunch of beautiful decal sheets. This activity almost certainly
fueled the interest in the field and I do see kits of jetliners around kit
contests now.
|
Click on images below to
see larger images |
 |
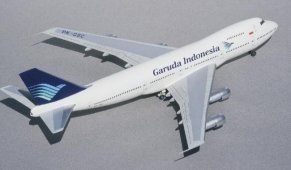 |
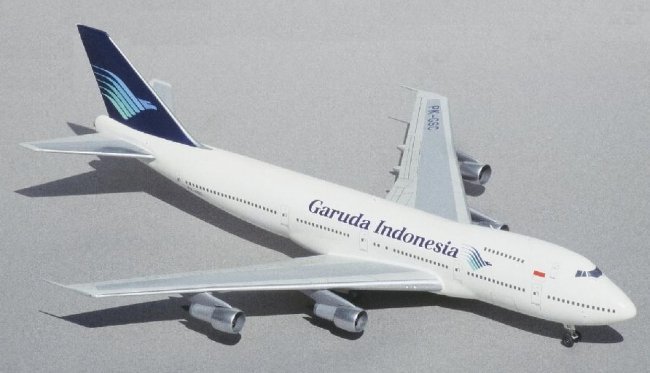
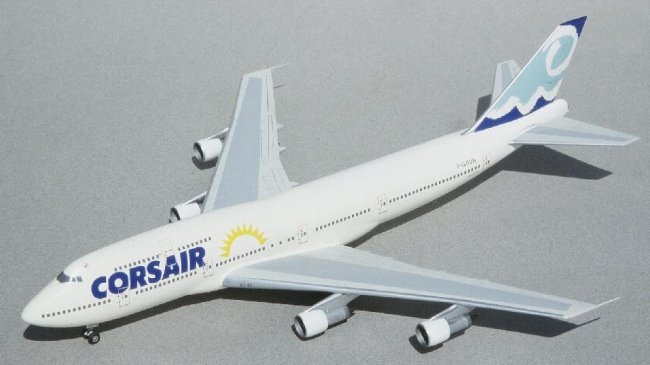
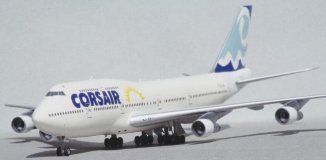
My
favorite amongst jetliners is the B747 family. They have graced the skies since
the early 70s but the sight of a B747 still is an amazing one. Until now I built
2 of them in the Hasegawa family : a B747-200 sporting the colours of Garuda
Indonesia and a B747-300 belonging to Corsair (French) airlines.
CONSTRUCTION
Construction
of these kits is quite straightforward. I prefer decals than clear windows in
that tiny scale. I therefore fill all windows. Fuselages halves are glued
together. Windshields are glued in position then filled. The sanding process is
quite long as fuselage parts are a good 35 cm long for the big Jumbos in this
scale. It is one of the major stages in the construction. Wings and stabilators
halves are glued together.
Wing
roots are reshaped to ensure a good fit to fuselage at the end of building. Even
in this small scale landing gears are detailled with lights, rods, links. Wheels
are painted and added to gears at this stage. Engines are built and painted. I
use shades of metallic silver on fan blades and give depth with a wash of Tamiya
Smoke.
I
observe documentation on real aircraft to add visible airframe details as
fuselage air intakes or exhausts, opened panels, antennaes, lights. They will be
added with paint, decals, scribing, plastic card according to appearance.
One
major issue is fuselage painting. Large white surfaces are a challenge. Airbrush
or Airsprays are needed here. I tested different techniques and although results
are fairly good I still have to find the definitive solution.
|
Click on images below to
see larger images |
 |
 |
Wings
and stabilators are painted a general light grey using the very good Xtracolor
"Boeing Grey" paint. Silver is added on all flying surfaces leading
edges. Then the coroguard painted panels are added using decals (paint is an
option either with Xtracolor Coroguard or mixing different colors – mixing
light greys and silver paint also will give you good results).
Subassemblies
are mated. I generally glue body landing gears first on B747s (ie nose and two
inner main landing gears). Wings then are added. Wing landing gears are cemented
(outer mains) taking care all wheels are on the ground which needs attention on
these 5 landing gear/18 wheels kits.
Decaling
is another time consuming stage, especially when you use one of the newest
superdetailed sheets coming with airline and technical markings. That's when you
kit starts to look like a little jetliner. I used a Liveries Unltd decal sheet
on the Garuda B747. The Corsair livery comes from a Flightpath with the addition
of a specialized technical datas sheet.
A
few additionnal finishing details are added like wheel doors and beacon lights
(I use Kristal clear and Tamiya transluscent colors – mainly red and
Blue/green).
Eric
|
Click on images below to
see larger images |
 |
 |
|