|
HISTORY
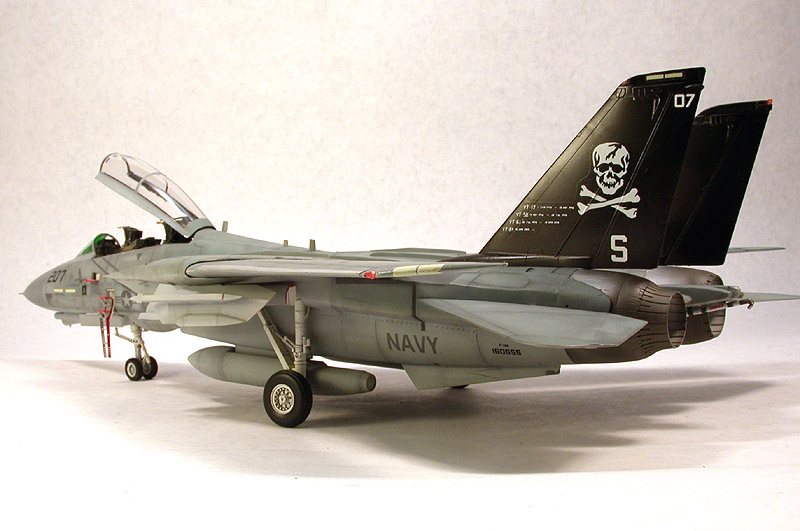
The Jolly Rogers have enjoyed a
rich history, dating back to the F-4U Corsairs of VF-17 during WWII.
Since then the Jolly Rogers have changed squadrons five times, and have flown
a number of different planes, from the Corsair, Bearcat, F9F Panther/Cougar,
FJ-3 Fury, Demons, Crusaders, and Phantoms, finally settling in with the F-14
Tomcat. The unique markings of the Jolly Rogers have made it one of the
most popular Tomcat squadrons in history, and one of the most frequently
modeled Tomcat squadrons as well. Look around this very site, and you'll
see no less than fourteen Tomcat articles in the markings of 'The Bones'.
THE KIT
The kit is Hasegawa's F-14A,
"Atlantic Fleet Squadrons". My particular kit had decals for
VF-154, which of course I didn't use. The kit is incredibly well
detailed, but is not without its own peculiar set of quirks in terms of
construction (but we'll get to that later). In addition to the kit
itself, I decided to use the Black Box cockpit set for this model.
Decals are Superscale's "F-14 Black Tail Tomcats", and were provided
by my good buddy Steve Stohr of North
American Hobbies -
thanks a bunch for hooking me up, my friend!
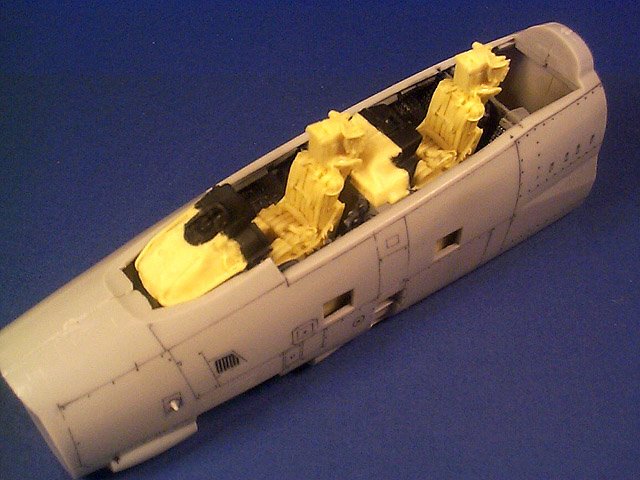
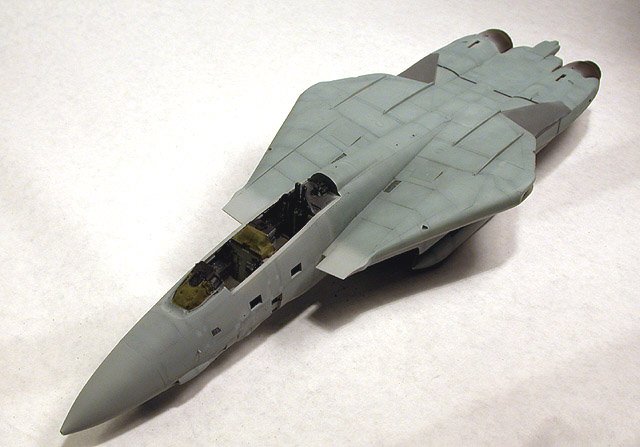
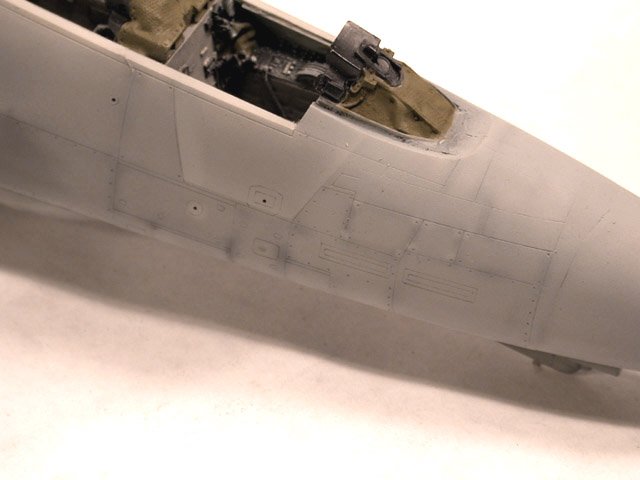
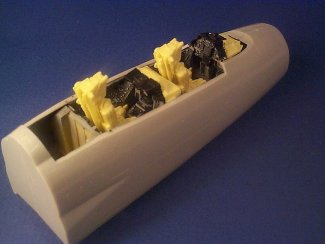
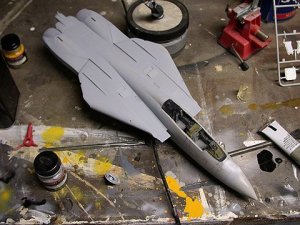
CONSTRUCTION
As is usual, construction begins
with the cockpit/forward fuselage area. Since the Black Box kit
was being installed, there were a few special concerns in getting everything
to fit. The Black Box instruction sheet instructs you to remove the
rails on each side of the forward fuselage, as well as the footwells for the
upper boarding steps, and the top part of the inside of the access hatch for
the boarding ladder. I found that it wasn't going to be as easy as all
that. It took me quite a bit of sanding, scraping, and test-fitting to
get the set to fit into the forward fuselage halves, but I have to say - in
retrospect, it was definitely worth it for the sake of the added detail.
However, I think that my next Hasegawa Tomcat is going to have an OOB cockpit,
with maybe a little good old fashioned scratchbuilding/superdetailing thrown
in for good measure.
|
Click on
images below to see larger images
|
|

|
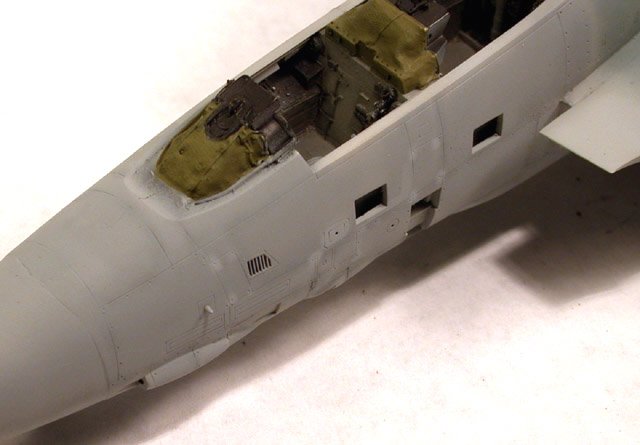
| The seats were
also completed at this time, but were not installed until much later.
Once the forward fuselage
had been completed, I set it aside for a while, and went to work on the
aft fuselage. First order of business was the wheel wells.
I've got to tell you, this was probably one of the most complicate wheel
well assemblies I've ever seen on an aircraft model kit. Be very
careful in assembling these, as it will affect not only the fit of the
upper/lower fuselage, but also the sit of the aircraft as well (don't ask
me how I know this  ). ). |
Click on
image below to see larger image
|

|
|
| If
you have this kit, and afford some extra aftermarket parts, I'd recommend
the Aires wheel wells for this kit. It will still require some skill
in assembling, but it should make things quite a bit easier. |
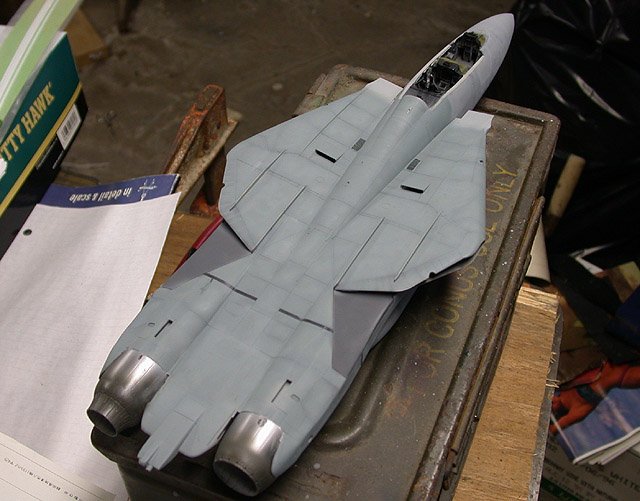
Once the gear wells
were assembled, the upper and lower fuselage halves were joined, and
construction commenced on the aft fuselage. The boattail and exhausts
were added (another tricky part of the construction process here - I'm not
really sure why this had to be a separate assembly, but oh, well.......).
The intakes were also completed and installed at this point. To correct
the intake ramps, I followed the instructions in Dave Aungst's outstanding
article at
Hyperscale, which
describes the assembly of the Hasegawa F-14 in excruciating detail. I
highly recommend it to anyone building this kit.
| Once the
majority of work was completed here, the forward and aft fuselage parts
were joined, the resultant seam filled and smoothed out, and a coat of
primer followed. Now, it's beginning to look like an airplane!
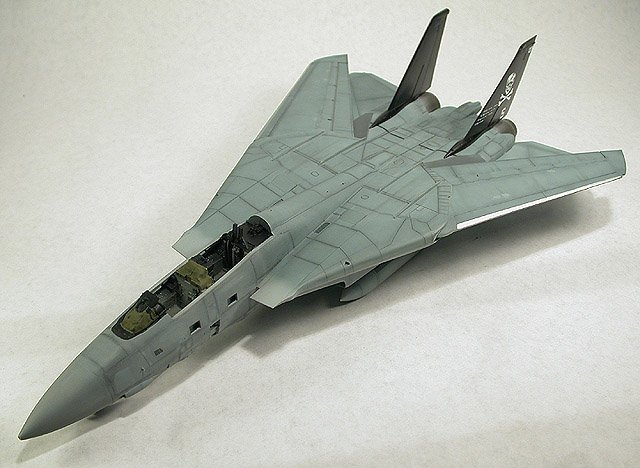
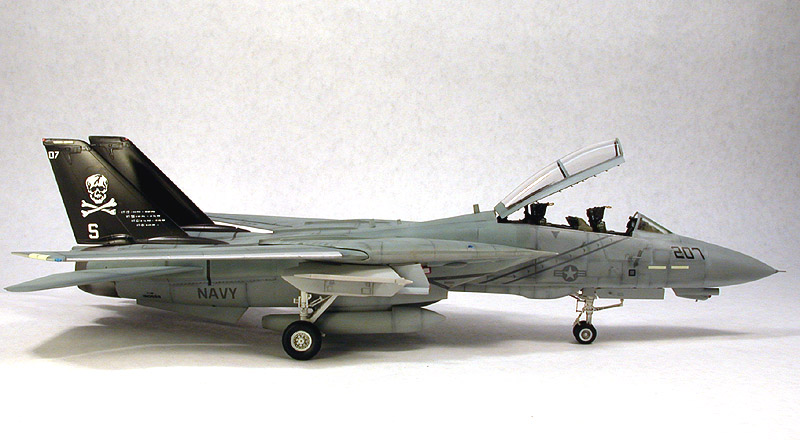
The wings were also
constructed at this point, as well as the vertical tails. The
vertical tails were also painted and decaled at this point, but not
installed until much later. I didn't want to have to do any complex
masking, and this was the easiest way to prevent that. The
wings/tail were painted, weathered, and set aside while the painting and
weathering commenced on the fuselage. |
Click on
image below to see larger image
|
|
|
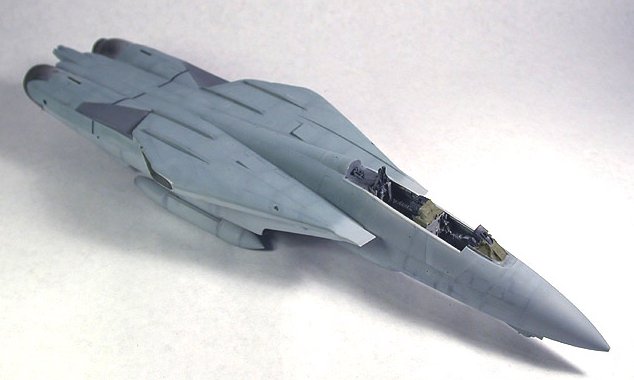
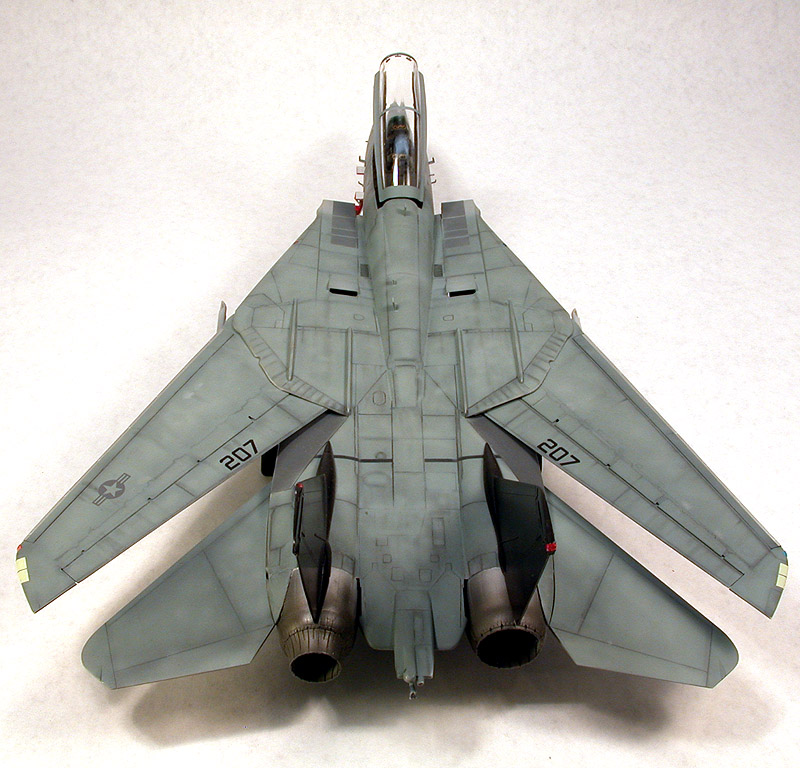
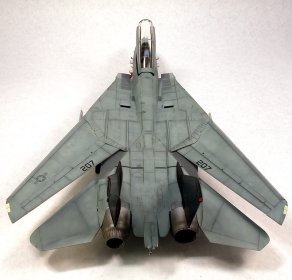
The fuselage was first preshaded,
and then painted in the TPS colors of FS36375 Light Ghost Gray for the
undersides, FS36320 Dark Ghost Gray for the nose, and FS35237 Medium Gray for
the topside surfaces. The paint was thinned with lacquer thinner (great
stuff, BTW!), and applied in very thin coats so that the preshading would
still show. In addition, some touchup spots were added to the model at
this point as well.
The rear fuselage was masked
off, and the exhausts were painted in a basecoat of Alclad Aluminum.
This was later weathered with very thin airbrushed coats of burnt sienna,
thinned with lacquer thinner.
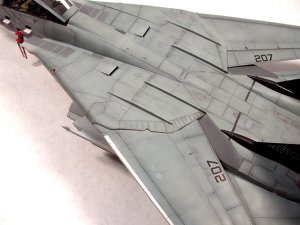
I developed a new technique for
weathering on this one, which involved drawing in all of the panel lines
with a pencil, and then blending the lines out with an artist's blending
stump. This is an artist's tool which looks like a pencil, but is
actually tightly wrapped paper. Artists use them for blending pastels
and charcoals, and they sell for $1-2 USD at most craft/art supply
stores. This was done directly over the basecoat before any clearcoat
was applied, so that the end result would blend with the overall paint job.
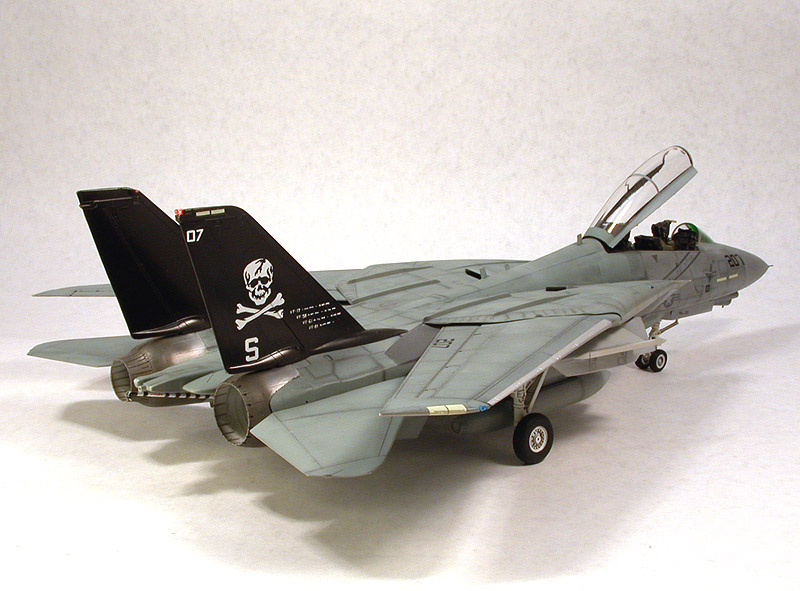
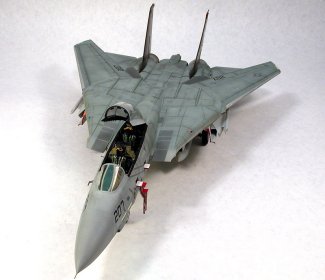
With this complete, the tails/wings
were attached, and the model was overcoated with several coats of Future.
It was left to dry for 48 hours, and decals were applied. As far as I
can tell, this particular aircraft wore minimal stencils, so I left most of
them off. Everything was left to dry overnight, and the next, day,
any silvering was taken care of with a careful dose of Solvaset. Go very
easy with this stuff, and apply it with a fine brush. It's easy to
overdo it, and ruin a decal permanently.
|
Click on
images below to see larger images
|
|
|
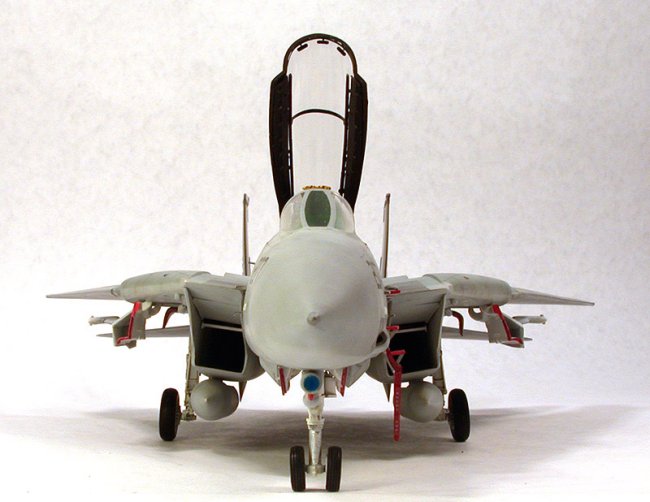
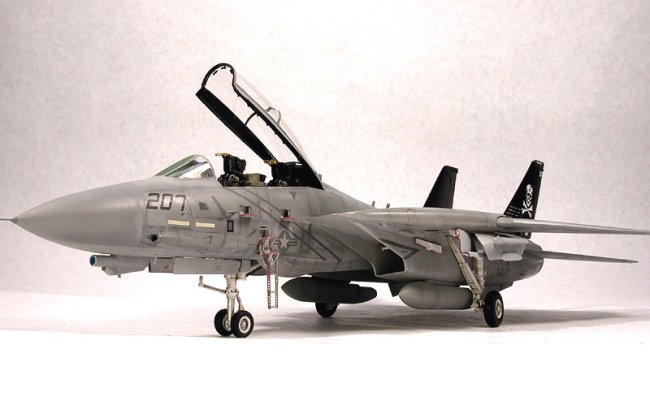
Now that the major construction
was complete, it was time to attach the landing gear. These were
superglued in, and given a wash of Raw Umber. Gear doors were edged in
Red with a Sharpie marker and attached at this time as well. You'll note
that some of the gear doors are somewhat misaligned. I fixed this
afterward, but unfortunately didn't get a chance to take another photo.
Just so you know I fixed it...........
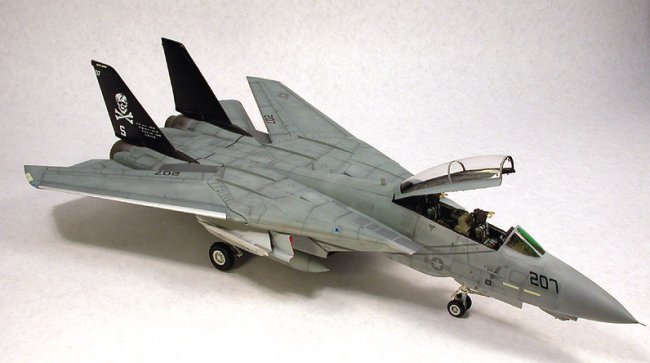
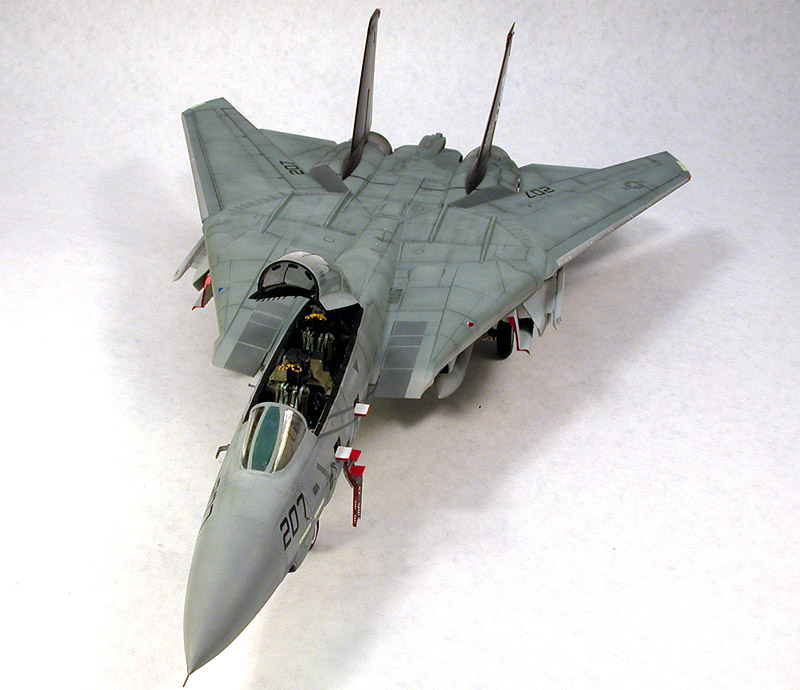
Final details included painting
and attaching the canopy, wing glove weapons rails, and seats. The model
was airbrushed with Testor's Dullcote, thinned with lacquer thinner, and a
final dusting of pastels in select spots completed the model.
CONCLUSION:
Seems strange to sum up the
construction of this kit in only a few paragraphs. The truth is, this
kit was started over three years ago, and was sidelined a number of
times in favor of other projects. You know, ones that can actually be
completed! I have to say that finishing this kit pushed my modeling
skills to a new level, if only out of sheer necessity to get it done! I
recommend it to experienced builders, but the truth be told, I still
maintain that the best 'bang for the buck' F-14 in 1/48 is the Academy kit.
It is not quite as detailed as the Hasegawa, but it much easier to build,
and the detail can be added with a scriber, some elbow grease, and a
little determination.
|
Click on
images below to see larger images
|
|

|
REFERENCES:
| My
sincere thanks once again goes out to Steve Stohr at North
American Hobbies |
| for
graciously providing the VF-84 decals for this article. Steve is a
great friend, and if you're looking for hobby supplies, I encourage you
to visit his website at http://nahobbies.com.
If you don't see it listed on the site, Steve can get it for you, and at
a really great price to boot! |
|
Steve
|
|