|
This is the 1/72nd scale Special
Hobby FMA IA.58A Pucara, built out of the box. I've come to love limited run
kits, of which, this is one. You get subjects you wouldn't normally see
and while limited run kits are vastly improved over years past, they
provide a bit more of a challenge. The shake-and-paint ProAcdadamiyagawa
kits are great and I love them too, but finishing a limited run kit and doing a
good job
on it gives one more of a sense of accomplishment. If it sometimes sounds
like I'm slamming this kit, I'm not; I enjoyed the build and I love the finished
product. So, what's in the box? A mix of injected plastic parts (including the
canopy), resin, photo etch, and acetate (what? no vacuform?). The fuselage,
wings, and horizontal stabilizers. have very fine, recessed detail. Fuselage and
wing breakdown is slightly different than usual. You get left and right fuselage
halves (ok, maybe they're not quite half), split vertically, and you get a
bottom insert that includes the bottom of the fuselage from the nose,
back to and including the area just behind the wing, and outwards to the
inner quarter of the bottom wing. It also includes part of the fuselage
side forward of the wing. This setup practically guarantees wing alignment.
There are two upper wing halves, and two
more pieces to complete the wing bottom. Main gear well detail is injected
plastic inserts instead of the resin inserts that come with many limited run
kits. While not as detailed as resin inserts, the injected plastic is
easier to work with. The smaller injected parts, such as the landing gear struts, are not as finely molded, but hey,
this is a limited run kit, right?
|
Click on
images below to see larger images
|
|

|
 |
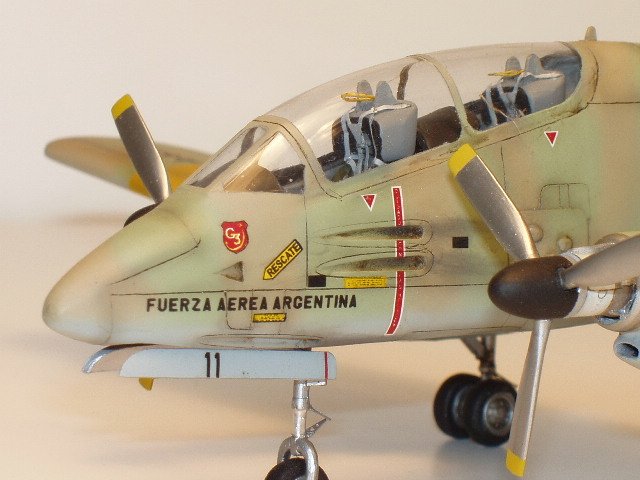
Since I generally
build my aircraft models from the inside out, construction begins with the
cockpit. Out of the box, it's not wonderful, but adequate. The seats are resin
and are dressed up with PE belts and ejection ring. The instrument panels are
acetate
sandwiched between an PE face and plastic backing. Side consoles are
plastic with a detailed PE strip glued on top. Other cockpit bits include
plastic joysticks and PE rudder pedals. All of this sits on a strip of plastic
that fits into the fuselage insert. I didn't get creative with painting the
cockpit; dark gull gray, with black instrument panels and consoles. Before
I glued the cockpit to the fuselage insert, I put as much weight as I could into
the front of the model; there's a lot of thick, heavy plastic aft of the main
landing gear.
Once the cockpit was done, I started with construction of the airframe,
which went surprisingly quick and well, even considering one little glitch and
two fit problems. First the glitch. Remember I said having the part of the wings
molded as part of the fuselage
insert practically guarantees wing alignment? Well, that assumes that the
fuselage insert isn't warped, like mine was. The left side had an anhedral,
while the right side was flat. Hot water, a hot hair dryer and gentle persuasion
fixed that problem.
Every model of a multi-engined propeller airplane with the engines in
nacelles that I've built had fit problems around the nacelles, so why should
this one be different? The back half of the nacelles are part of the wings, and
thus, are split horizontally. The front half of the nacelles are composed of two plastic pieces split
vertically and a resin face. Every one of those joints required filling,
sanding, and subsequent rescribing.
The other fit problem was the canopy, which was significantly narrower than its
attachment point on the fuselage. This took several rounds of careful filling
and sanding, but I stuck with it until the canopy and windscreen were blended in
to the fuselage to my satisfaction. A side not here: I've been using CA glue to
blend in my canopies and windscreens for about 15 years now, and I've never had
a problem with fogging on the inside. I just take precautions. First, if there is a gap
between the clear part and the fuselage, I fill it with Elmer's glue first, and
second, I apply small amounts of CA over the dried Elmer's.
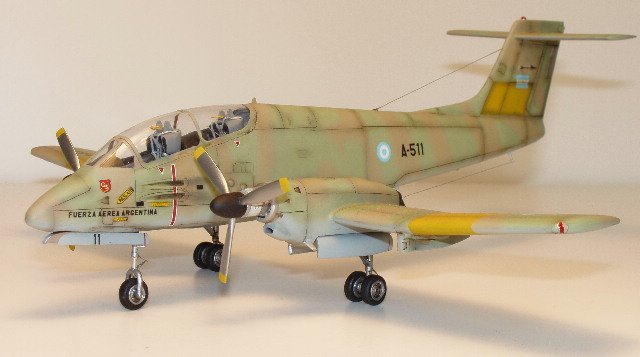
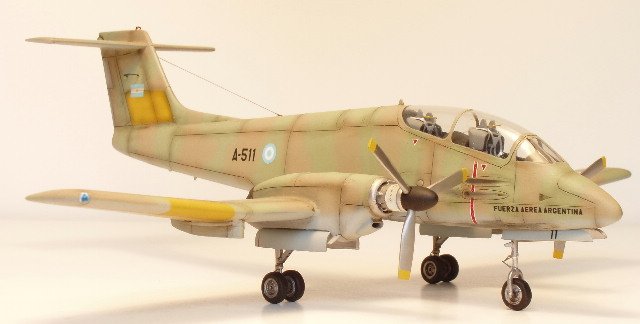
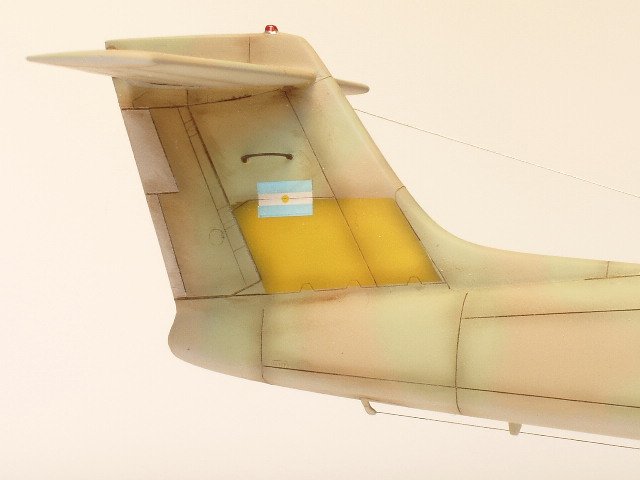
Decals are included for
four Argentinean aircraft. Options include two aircraft in overall
aluminum, and two in a tan, light green, and light blue camouflage scheme, one
of those being an aircraft with yellow ID bands on top of the wings and on the
vertical stabilizer. I chose the one with the yellow ID bands.
I found some pictures of a well-worn hanger queen Pucara in the scheme I
wanted to do, then set about to find the right colors.....or a close
approximation. At the local hobby shop, I found, to my utter amazement, that the
Model Master paint rack didn't have a section for Argentinean colors. Oh noooo!!
What to do, what to do! The bottom color was an easy choice; Model Master RLM
76, but the top colors were gonna be tough, or so I thought. I started
scrounging through my paint stash, and found Tamiya Sky, XF-21 and Buff, XF-57
were almost exact matches for the pictures I had. No mixing of colors...YeeeHaaa!!!
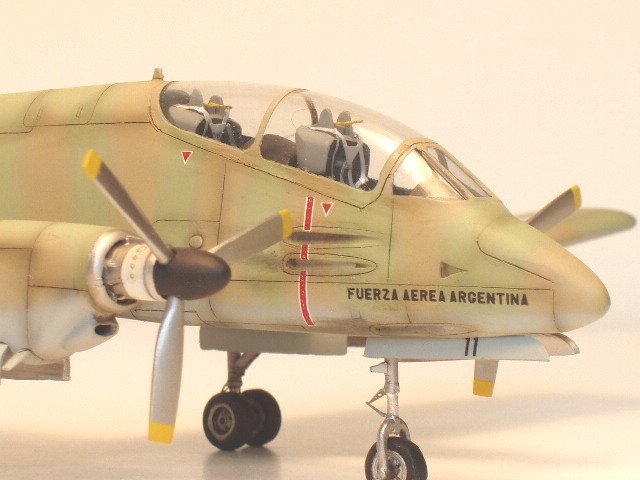
Since my reference was a heavily weathered, beat-to-snot, hanger queen, I
tried to go for that same look. I first pre-shaded the panel lines with black,
then sprayed the bottom with Model Master RLM 76 and the yellow ID stripes, then
masked off the yellow. For the top, I very lightly penciled in the camouflage
scheme then freehanded the tan and green using the XF tip on my Badger 150.
Unfortunately, I was concentrating so hard on getting sharp demarcation lines
between the tan and green, I didn't notice until too late that I had completely
covered the pre-shaded black. No problem, there's always Tamiya smoke.
Several coats of Future and the model was ready for decals. The kit decals
were great, being very thin, in register, and responding well to Micro-Set. If I
have any complaint at all about them, it's that they stick too fast. You better
get that rascal in place right quick, or it's gonna stay where you left it.
After the decals, I went over the panel lines on the top and sides with a
dusting of Tamiya Smoke to make up for
the pre-shading I lost while painting. This was followed by another coat
of Future, an oil/turpanoid wash, and finally, a finishing coat of Testors
Dullcoat. Another side note: except for Alclad II over bare plastic, I get away
with spraying anything over anything else. I spray lacquer over acrylic and
enamel; enamel over acrylic and lacquer; acrylic over enamel and lacquer. I just
take several precautions if I'm doing one type over a different type; first, I
make sure the base coat is totally set by letting it sit for several days and
second, I lightly mist on the dissimilar coat.
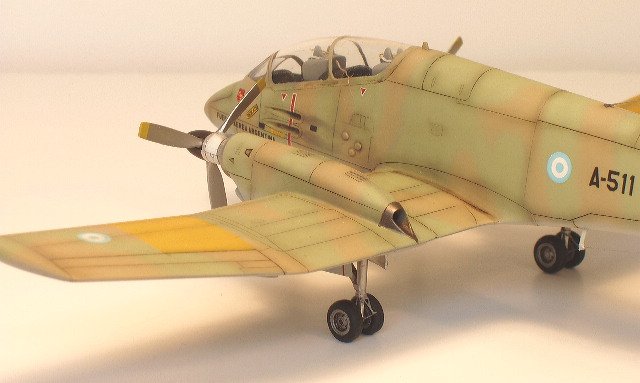
After the finishing coat was dry, I added the landing gear, wheels, gear
doors, propellers and antenna wire, and my Pucara was done. Sometimes when I
look at it, I
think I overdid the panel lines, but then I look at my hanger queen
reference photos and realize I'm not that far off.
Chip
|
Click on
images below to see larger images
|
|

|

|
|
|
|