|
|||||||||||||||||||||
|
|
|
|||||||||||||||||||||
|
|
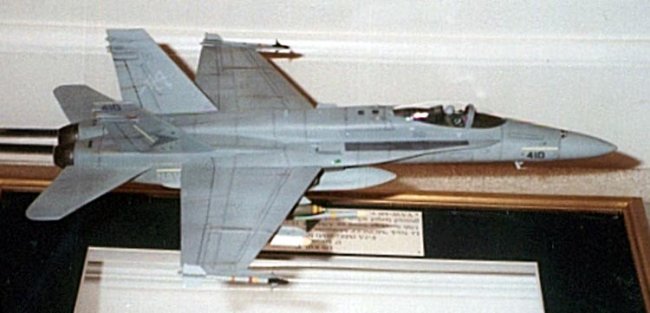
It’s rare to have the opportunity to build a model for a good friend and fighter pilot. It’s even more rare if your good friend is also a Mig killer. My good friend, Lt Cmdr Nick "Mongo" Mongillo downed a Mig 21 on the first day of the Gulf War flying an F/A-18C from VFA-81 (buy the book Bogeys and Bandits….it’s a great read and goes in depth into Mongo’s shoot down). Thanks to Mongo….I have had many opportunities to visit Navy flight lines, ride in simulators and watch carrier landing practice. I "owed" Mongo big time…. So I decided to repay him with a model! I decided to build a model of his Mig shoot down. The Hornet is flying, with the Sparrow coming of its rail….. The basis of the model is Monogram’s 1/48th scale F/A-18. It is basically box stock, but allot of attention was paid to fit, alignment and finish. It is amazing how well a OOTB model can turn out when you take the time to do it right. As with any model… DON’T RUSH! The model went together well with the usual seam work required. I would consider the fit of parts to be good….with the exception of the landing gear doors. I choose to pose my model flying which meant the doors would need to be closed. Unfortunately they didn’t fit the bay openings very well. But….don’t panic…just slow down and CAREFULLY trim and fit each door. It took me about 5 hours to get this done but the result was very satisfactory with all doors closing and being "tight". A technique I learned from the scratch builders is this….. BUILD AND USE AN ALIGNMENT JIG.
For every model I build I construct a simple "cradle" that the model sits in. This jig takes me about 1 hour to build (I use styrene sheet) and I am careful to make sure that the jig is built accurately. As you can imagine for each type of aircraft you build your jig will change but… save all of your jigs. A future model might fit an existing jig. The main purpose of this jig is to provide alignment of all of the flying surfaces. TRUST YOUR JIG not the fit of the parts. Example…. When you attach wings to a fuselage you would normally get the joints to fit as well as possible (minimal gaps) then apply the glue (I use super thin CA). But using this method you don’t really know if your ALIGNMENT is correct. I have built many models where after cementing the wings I have found them to be off a few degrees…ARRRGH! Now I have my fuselage supported in a jig…THEN I can glue on my wings, stabs etc knowing that all my dihedrals, angles etc are correct. The joints might take a bit of extra work to fill but that’s OK. In contests, one of the first things judges look for is ALIGNMENT.
Other notes:
The model took about 50 hours to complete and now resides at NAS Fallon where Mongo is now a Top Gun instructor. John Formon
|
|
Photos and text © by John Formon