|
Canadair
CL-13 Sabre
The
first Canadair CL-13 Sabre built in quantity was the Mk2. This corresponded to
the USAF’s F-86E, which was powered by J47-GE-13 engine, and 350 were built.
The Mk4 was also powered by same type of engine. The only Canadair Sabre Mk3
built used the prototype Orenda engine that was flown by Jacqueline Cochrane to
raise the woman’s speed record to 625 mph. The Mk4 also introduced a different
wing, which had extension of 6” at the root and 3” at the tip. The Mk 5 was
similarly equipped but had the Orenda 10 engine giving an increased rate of
climb. In all 370 were built followed by the Mk6, which was the definitive
version and was powered by Orenda 14. The first example flew on 2nd
November 1954 and used the original slotted wing but with the extension at root
and tip. A total of 655 were built. Canadair Sabres were also supplied to
Germany, Italy, South Africa, Columbia and the RAF.
Click on
images below to see larger images
The kit built review
Kit: Canadair Sabre
Scale: 1/72
Make: Frog (circa 1954)
Markings: RCAF fighter Squadron
Type: injection molded, very basic, but modified to bring to Mk6
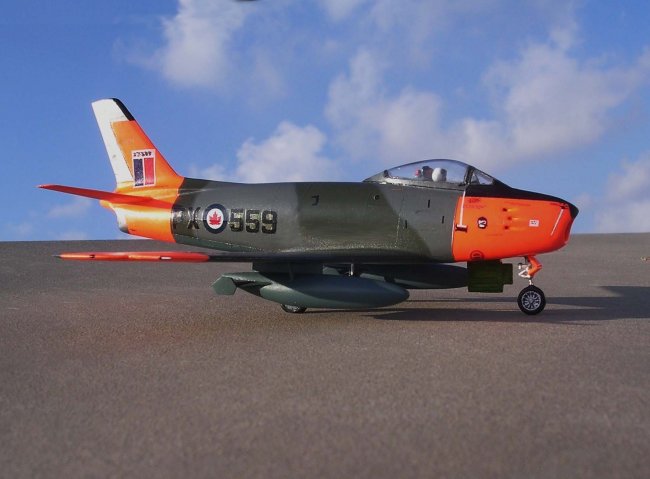
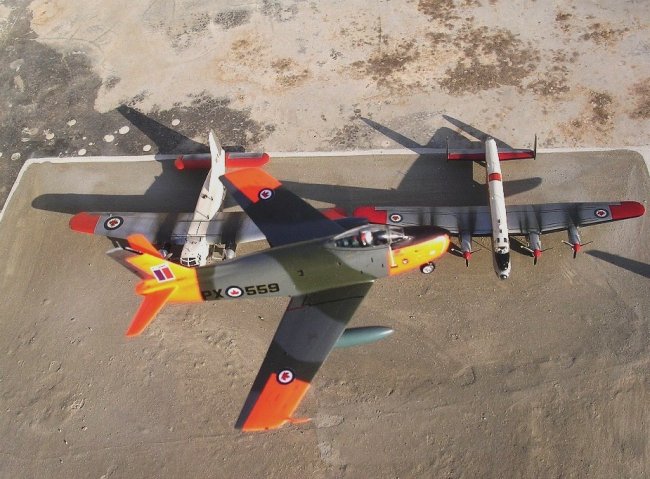
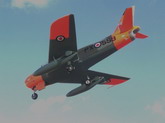
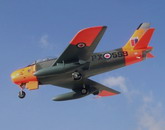
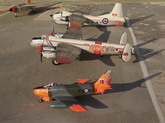
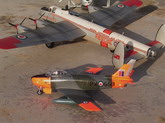
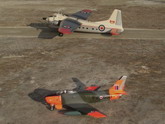
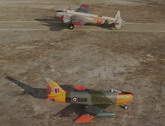
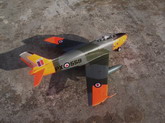
The subject of the kit build is a Canadair Sabre Mk6 serial No 23559. PX559. This was a Royal Canadian Air \Force Sabre based at Cold Lake in 1959. The particular Sabre was on strength at Central Experimental and Proving Establishment/Air Armament Evaluation Detachment.
The Kit
The Sabre always appealed to me as an ideal interceptor fighter but was inspired to build the Canadian Sabre after I encountered a photo and side view drawing of it in Aviation News Vol 5 No 4 which also contained scale plans of the type at the center pages. In due course I also built up a particular attraction for those
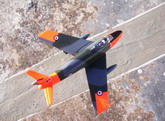
colour schemes carrying high visibility markings. This is normally associated with combat aircraft that are attached to test and evaluation programmes; or aircraft operating in the arctic region; transport aircraft; and trainers. The Canadian Sabre subject easily fitted in this class of fancy
colour scheme with the high visibility day-glow orange at areas on the fuselage and wings. It sounds contradictory to have a camouflaged aircraft with high visibility markings but this is the way it goes and such schemes existed to mention a few: RAF Canberras, Dutch Beavers, Pakistan AF Otters, Saudi Strikemasters, Danish Dakotas, and Greek Buckeyes etc etc.
Frog issued the Sabre kit many years ago. Injected in grayish silver plastic of thick section, it was very basic with lots of rivets, wheel wells non existent, also included lead weight to assist kit balance on nose wheel, crew figure integrally molded with the rest of cockpit. Air intake and canopy of incorrect shape and the undercarriage was very basic which needed definite replacement. The instruction sheet consisted of a drawing depicting the few parts in an exploded view. The kit also came with a pair of fuel tanks but these were smaller than the ones used on the operational aircraft and were at best discarded. The decal sheet was also basic with markings for one RAF
Sabre.
Construction.
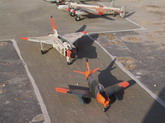
Checking the kit with scale plans by Aviation News, the wing swept angle was conforming however each wing was 3.5mm too long at the tips, so this was corrected accordingly. The heavy riveting detail on this old Frog kit was all removed and new panel lines and air brake panels were re-scribed. The tail planes were grossly oversize and were replaced with a new set coming from the Heller f-86E. The nose air intake was of incorrect shape and again replaced with one from the Heller Kit, as were also the undercarriage parts. The fin and rudder were reduced and reshaped to conform to scale plans. The Orenda 14 engines had slightly larger exhaust orifice than J-47GE-13 on the F-86 and so the fuselage of the old Frog kit proved useful for the type. The kit fuel tanks were too small and again replaced with a set from the Heller kit.
The cockpit was rebuilt, adding an adequate ejection seat, crew figure, shoulder straps, instrument panel and control column and all the corresponding interior paint detail that easily was visible in a clear canopy. Building the cockpit also meant that I had to find alternative space in place of the slot provided to take the weight capsule provided to get the model sit on its landing gear. The front jet intake nose was cut vertically with a saw blade and the new
one fitted from the Heller kit. An outlet jet orifice was made from a plastic pipe from spares
box and fitted at the aft fuselage. Nose wheel well was marked and cut, its walls built and the undercarriage inserted. A new nose wheel door was built from plastic card. New fuel tanks, pylons, and undercarriage items and a clear canopy parts all came from the Heller F-86 kit. A metal pitot tube was bent to shape and fitted to the starboard wing tip. A stubby metal drainpipe was also added to aft engine area, port side.
Colors and Markings.
The Sabre Mk 6 23559, RCAF Cold Lake 1959 was an aircraft on strength of Central Experimental and Proving Establishment/Air Armament Evaluation Detachment. The areas in orange day-glow were first given an undercoat of satin white and after it dried I airbrushed Humbrol day-glow orange. These areas were then carefully masked and the underside coated in PRU blue using JP enamel paints. For the upper surface camouflage of ocean grey and dark green I used Hannants Xtracrylic XA1044 RAF dark sea grey and XA1001 RAF Dark Green. The model was then given a coat of Klear prior to putting on the decals.
Markings were cobbled together from many aftermarket decal sheets. Particularly stash from Micro scale 1/72-decal sheets that I collected over the years. The Canadian roundels came from decal sheet CAN-FORCE-DECALS CF-1, the fuselage letters and serial No from Hales Frogelite sheet of the required size letters, small stenciling from Micro Scale Decal Sheet No 72-100. The nose markings of this particular Sabre consisting of the word Queenie and Wand on starboard side of nose were hand painted, as also was the CAPE/AAED crest on both sides of nose. Red white blue fin flash was cut to size and stuck on a white decal sheet so that it leaves a white periphery around the flash on both sides. Some of the decals were old, so I painted the sheet with Klear liquid before cutting the individual decals apart. The coating will seal the decal to the paper permanently. After decaling the model was coated in semi matt Model Master varnish.
Conclusion
Overall this project took twice the time it would have taken for a kit built straight from the box. The extra work done to produce a Sabre Mk6 was worth the effort as it is a kit with a difference and more enjoyment is gained from the conversion itself. It is imperative to research the subject well and get the appropriate decals for it. This kit should appeal in particular to Canadian modelers who want a Sabre Mk6 complete with unique attractive colors.
Reference: Aviation News Vol 5 No 4 issued 5th August 1976.
Carmel J Attard
Click on
images below to see larger images
|
|