|
This latest build, an overall well molded kit of the well utilized Navy and Air Force flight trainer, turned out to reflect my build expectations, but I have to be honest and say it was a struggle in a few areas of assembly. I'll elaborate below.
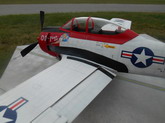
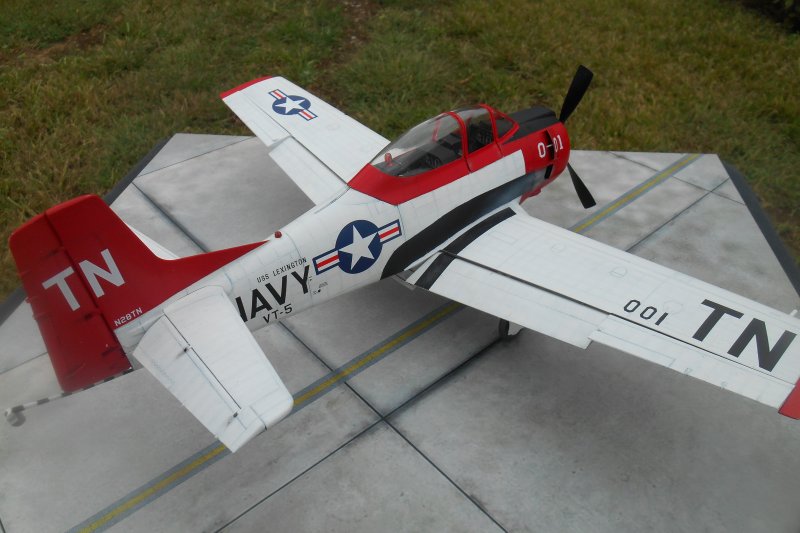
The Kitty Hawk kit box graphics have always drawn my attention, to buy and build the pieces of plastic into what the box art looks like. The accompanying decal and color schemes inside the instruction booklet, showing markings of various units that used the aircraft type, are works of art in themselves; I commend Kitty Hawk for their research and fidelity to detail regarding the units depicted.
The instruction booklet layout was logical and seemed complete; overall, it's preferable to assemble the model per the instruction step sequence, although for an experienced modeler, sub-assemblies for later mating with the larger structure would be a viable alternative.
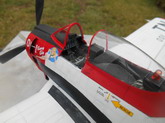
I followed tradition and started with the cockpit. In this area I was very pleased with level of detail and crispness of molding. I didn't have to ask myself if I should await after market sets: this kit had it all for my tastes. The instrument decals (see photo of cockpit interior) were miniature works of art. I used the decals for the main instrument panel, but felt there's no substitute for the raised knobs and such on the side consoles. I hand painted the console details.
|
Click on
images below to see larger images
|
|
|
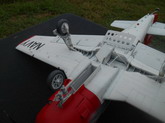
My first bout with frustration came when I beheld the engine assembly steps. There are no fewer than four steps involved with the engine, but let me say this emphatically: Unless you want to display the engine and all its parts, don't bother with most of Step #5! I say this because later in the assembly, I could not fathom, from the instruction booklet diagram, how the top cowling cover would sit: the diagram showed four hooked plastic pieces upside down. Besides this, I never found any photo from my collected archives that showed how the top cowling was displaced/raised from the fuselage.
Thus, since I had to opt for a closed cowl model, I could dispense with many of engine parts supplied and shown. In fact, I had to! Kitty Hawk was prescient enough to include two (2) chunks of cast metal, for proper weight to allow the tricycle gear to sit in contact with the ground. The instruction booklet, however, provided no sketch or wording as to the weight placement! I found with my closed cowl display that one chunk would fit between the firewall part and the radial engine sub-assembly - if I removed some assembled parts per Step #5; the other chunk went unused, as I found the model will sit on its three wheels with one chunk. Where the two metal pieces would (should?) be placed in an open cowl display caused my mind shudder.
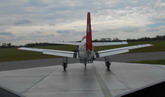
A second area that caused me considerable frustration was with the landing gear assembly: it has too many little, fragile parts that must be handled
carefully, lest they crack or get lost in the carpet, and/or 2) have to be assembled with too little direction by the instruction booklet again. The main gear oleo bracing, for example, showed two parts (F87 & F89, then F88 & F90) for each strut that showed inadequate orientation, plus I had to guess where on the strut they went. I had to sand a small notch on the strut to add adhesion once I deduced where they should go. I should mention I added fine steel wire on each strut to simulate the hydraulic brakes.
Then there are small braces that keep the outer, longer wheel cover apart from the inner cover that's next to the tire. They're very thin and flimsy. Resign yourself to letting each strut set overnight after gluing.
A last weak area was with the rudder assembly. The instructions showed only one side worth of parts that had to be affixed to the flank of the rudder; another set of the same parts have to be added to the other flank.
The kit came with a number of additional parts, but could only be used if that Trojan modification was selected, e.g. the close support fighter bomber version used in Viet Nam. I disposed of these unused parts.
I liberally used Squadron's "T-28 Trojan in Action" (No. 89) for weathering appreciation. I was amazed at the amount of wear these trainers collected, so I wanted to simulate a well-weathered warrior, ready for the
Davis-Monthan (Arizona) Boneyard. I applied a coating of Future to the assembled aircraft (minus the wheels and prop). Then I used a blackwash, hitting all the panel lines and rivet holes. After drying, I used paint thinner and Q-tips to selectively remove the wash as desired. I sealed the model with another coat of Future thereafter.
I airbrushed accumulated engine exhaust on each side of the rear cowl using light gull gray, then restricting the nozzle opening to better control the amount of dispersed paint applied. I didn't want to create a gray-hazed mess.
The kit decals went on perfectly. I could have omitted use of MicroSet, but out of habit I did anyway. A note of caution, though: The three digit cowl numbers are only held together by two strips of film; they must be cut and applied separately if you want an open cowl vent display.
I recommend this kit for the experienced modeler, but only if one will overlook the instruction weaknesses.
Carl Jarosz
|