|
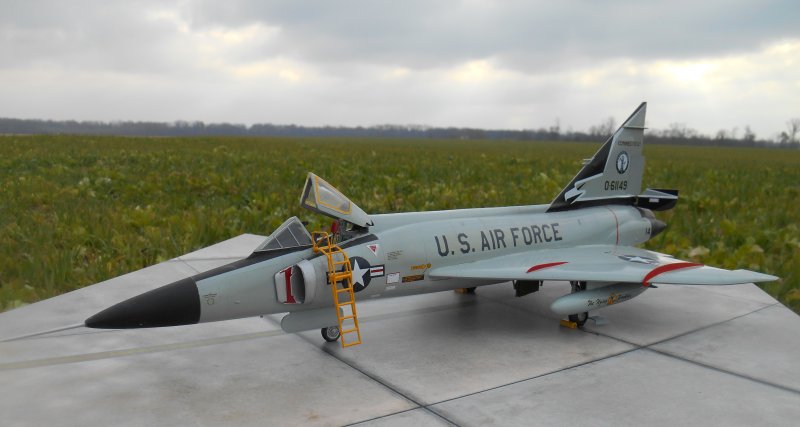
F-102A:
Connecticut 118th FIS
Not two months ago, I completed my first Convair Delta Dagger submission to ARC, a 1/72 build. That delta wing design stuck in my psyche: I had (on my musty shelves) a larger, 1/48 ProModeler kit of the Delta Dagger - with very unique tail markings for the 118th Fighter Interceptor Squadron, assigned to the Connecticut Air National Guard, in the 1960s. Besides that, as I scoured the ARC Gallery, I noted that no one previously built, submitted the F-102 using the mentioned unit markings. This truly is a first for me.
I committed a mortal modeling sin with the construction of this kit: Being a molded relic of by-gone years, by a well respected modeling firm, the metal molds were machined with recessed panel lines in the mold cavities. Translation: the plastic part ejected from these molds have reversed image, or raised lines as a result. I've read many modelers' descriptions of kits they built with raised lines - where they painstakingly sanded off said lines, and scribed recessed ones. First, I feel life is too short for such endeavors (and I'm not a masochist!). Second, the IPMS model winners of years past won their awards with the raised molded lines, being industry standard then. Third, Monogram (original molder of the kit) put great fidelity of detail into their molds, having the right curvatures and locations for all panel lines. I let well enough alone. Now take a look at the finished product: those raised lines are still discernable, adding a degree of detail to the parts.
Lastly, on this subject, I drove to a former air base that was active in my town back in the 1950s and 1960s. There are a couple of Vietnam era jets that have been put on static display at the airport
(ex-USAF base). I examined those previously flown aircraft: the sealant putty/filler used at a number of locations where aircraft skin parts met was applied to where it caused raised filler. It was apparently a sign that a proper amount of sealant filler was used, and I'd surmise some skin panels would have worked themselves loose from air friction if inadequate amount of sealant filler was employed, i.e. not enough sealant, causing a recessed panel line.
|
Click on
images below to see larger images
|
|
|
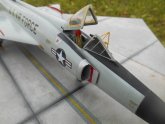
I built the kit virtually out of box. With such detail that this kit provided, any after market accessory would have been wasted money for little improvement. I only added scaled width safety harness straps and seat belts, made from Tamiya masking tape. To me, that material closely simulates the actual straps used and can be bent, folded to create any contour desired.
Finally, I opted to have the missile bay closed. I still maintain the F-102 (and its successor delta wing, F-106) looks so much more sleek with closed weapons bay. At least half the photos I examined of the F-102 also show the parked aircraft with closed weapon bay.
One nice aspect of ProModeler kits was their "little extras" that were included in the box. In this case, the kit came with a boarding ladder (components to be constructed). That's always nice to have for a parked aircraft: I'm often astounded by the bending and fabricating of metal pipe that was used for ladders on the real thing, and the formed ladder was only applicable for a particular type of aircraft. Another ProModeler extra: the kit came with weighted tires, i.e. the ones that make the tires look a little flat, but gives a more realistic effect of a multi-ton mass of metal pressing on rubber tires.
I used my trusty Model Master enamel paints, but I withheld any panel accenting. Staring as I might at photos of the 118th F-102s, they were virtually immaculate looking, save for the exhaust end. Then, too, the raised panel lines added a degree of standing apart from the plastic background, when viewed from various angles.

ProModeler decals have always been effortless to apply. I always use MicroSet as a wet undercoat where the decal is to be located. Once dabbed of excess water, I brush on enough MicroSol to coat the decal, but only once. Multiple strokes can cause the melting of the decal film to begin, with pulling away of the entire decal. Very embarrassing, to say the least.
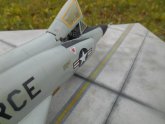
I added one last bit of flair on this build: From photos viewed, I noted many parked aircraft with main wheel chocks, namely fashioned wood blocks (some were
overdesigned, made of cast metal) - with twine attached on one end for maintenance/mechanic quick removal when the aircraft was ready to begin its taxi roll. I saved characteristically formed sprue from an Emhar kit, and noticed its form visually duplicated what I saw in the photos! It was easy then to scale the length of the
sprue, paint the plastic chocks yellow (the most common chock color in the photos), then drill a "blind" hole (a hole where it ends somewhere inside the piece being drilled, not going out the other side), and finally cut a scale length piece of larger diameter sewing thread. My last added detail was tying a basic knot on the end of the thread where the maintenance man/mechanic would have grabbed the twine, to reduce instances of the twine slipping out of the guy's grip when he pulled the chocks out of the
way.
Carl Jarosz
|