|
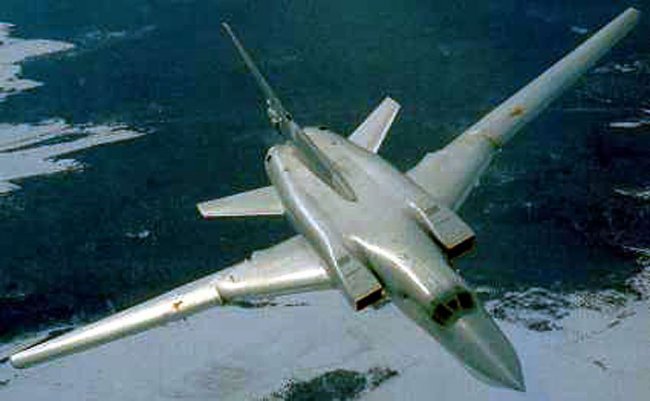
History:
One of the
greatest bombers in the Soviet Air Force, and now the Russian Air Force, the
Tu-22M was actually know as the Tu-26. The aircraft, which was originally
know to NATO as the "Backfire" was identified by the Soviet Union as
the Tu-22M. It began as a new concept from the Tu-22 with a
swing-wing design, and a whole new body. The new swept wing of the Tu-22M was especially
made for high performance, and it offered a far better solution. Development
of the aircraft started in 1966, but there were reports from the United States
that Tu-22 parts were converted into new prototypes. These statements were
absolutely false. These newly produced aircraft were specified as
"Backfire A", and were built to a completely new design, but still
kept some Tu-22 Blinder features. After the Tu-22M0, M1, and M2, came the last
version, the M3. The Tu-22M3 had two new Kuznetsov NK-25 engines that produced
25,000 Kg of thrust each. The new aircraft had some new visible changes. The
most significant were the new ramp-type engine intakes, the
"Down-Beat" tail radar, the tail guns, and exhaust holders. The nose
was also completely changed, and it carried a rotary launcher in the bomb bay.
This new bird had the NATO name of "Backfire C." About 350 are
estimated to be in service right now. The first flight of the Tu-22M3 was on
June 20, 1977, but it was deployed 4 years after, in 1981. It has a maximum
speed of 2,300 Km/h, but travels at a cruising speed of only 900. The Tu-22M3
can carry one to three H-22 missiles, six to ten H-15 missiles, 24,000 Kg of
free falling missiles, and one double barreled GSH-23 gun located in the tail.
One of the greatest bombers in Soviet history is still serving in Russia,
Ukraine, and India.
|
Click on
images below to see larger images
|
|

|
 |

|
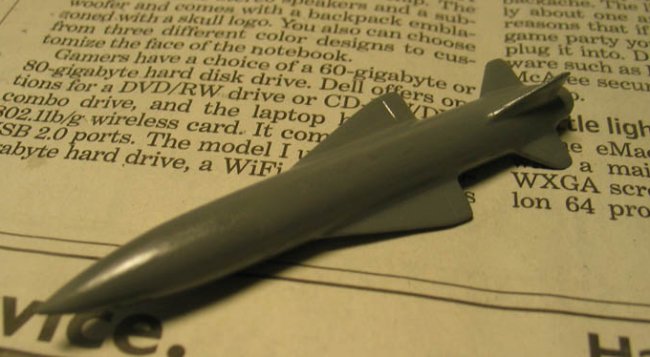
The Kit:
This is the Minicraft kit has a long history. My father bought this kit back in
Russia, and did not let me do it until my skills were really good, and then one
day he told me to make it. This tooling was developed by Minicraft and Academy,
as it says so on the box. This is the same exact kit as the 1/144 Tu-22M2,
except the nose and the intakes are different. It comes with rescribed panel
lines, average detail, and white plastic. The wheel bays have no detail, landing
gear has barely are detail, and the cockpit has some chairs and that's it. There
are many things needed to be done to make it an actual M3, and not an M2 with a
different nose and intakes. Looks like Minicraft just wanted a cheap way to make
a new model. Overall, the kit is pretty nice, but a lot more detail could be
used. Even though it is in 1/144, the model is still pretty big.
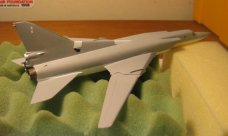
Construction:
Construction
started out like it always does. First came the fuselage halves, which included
the fuselage itself and the tail. I put several lead nose weights in the front
of the aircraft to keep it from falling on its tail with all the weapons it will
have. The cockpit was simple, and since it's really small, I didn't do
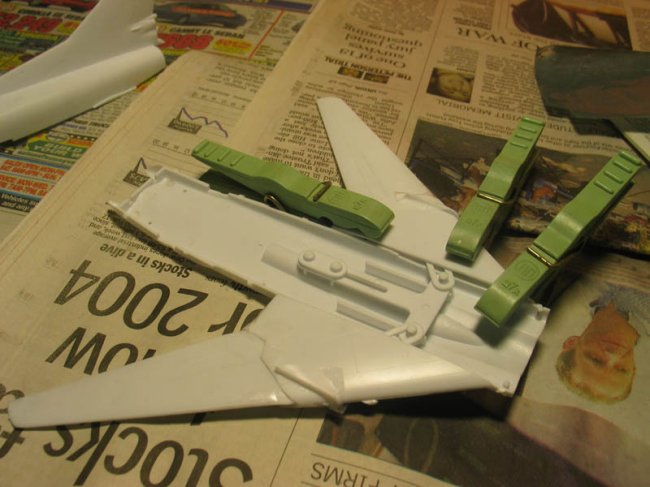
much detail. Then, one of the most complicated and most important parts of
the construction came, which was the wings. On the Tu-22M, the wings can move in
different positions, just like on the F-14 Tomcat. Minicraft developed a special
way to simulate this. The wings have long stick coming out of them with a hole
on the end of each. In the middle of the fuselage, there is a place where you
can hook up a long piece of plastic that has 2 bumps on the sides. This
moves so that when you put the holes on the ends of the wings onto the bumps,
they move simultaneously. The wings are held up on little bums that are
almost at the start of the real wing. These had to be sanded down for a
comfortable fit. When the whole wing assembly was done, this was glued on the
bottom of the fuselage. All of the sanding and filling was done, and I must say
it was not a pretty sight. The wing joints and the bottom fuselage joints
required a lot. The intakes had no problem, except with the join of the
fuselage, which took several putty applications. Then, the windshield was dipped
in Future, masked with Tamiya Masking Tape, and another coat of Future to stop
the paint from leaking through.
After
the main construction, there were several modifications that had to be made.
Since the kit is just a remake of the M2 with different intakes, there was a lot
of stuff to be done. I just changed the most noticeable things, and now the
small issues, like moving the whole wing section back or forth. First of all, I
had to shorten down the back radar, because it was way shorter, and had a
different shape on the Tu-22M3. Then, the back guns had to be totally changed. I
cut off the actual guns and saved them. Then, I sanded down the sides of the
area where everything was stored. I sanded the front part to get the right
shape, and then put the guns back on. The tail had to be sanded down to be
thinner so the new modifications would not be too small. These were glued on
later.
For
the weapons, there was an AS-6 included, which was pretty accurate. After
posting my In-Progress pics on the discussion board, my good friend Raymond gave
me a suggestion. He gave me a suggestion to build some AS-4 missiles. It was my
first scratchbuilding project, but I decided to go for it. I found some 1/48
AIM-54 missiles in my spare box from my F-14 kit that I threw away. They were
built poorly, so I had to cut off all of the fins and smooth out the fuselage.
Then, I cut them to precise length, and formed the nose to shape with some wet
sanding. The whole missile still had an empty space in it, which had to be
filled. I decided to use the parts that I cut off from the end of the body, and
put them in the fuselage one at a time. I glued them in, and let it dry.
Unfortunately, all this glue made the plastic really soft and it took almost 3
weeks for it to fully dry. It was the puttied up so the back would normal. I
sanded down the back into correct shape, and I just noticed that I turned a
complete childish build of an AIM-54 into a smooth AS-4 fuselage. The fins were
cut into shape, then glued on. The top fin was made of styrene sheet, because
none of the fins I had were long enough. I glued, them on, puttied, and they
were ready to go. My first scratchbuilding projects were completed.
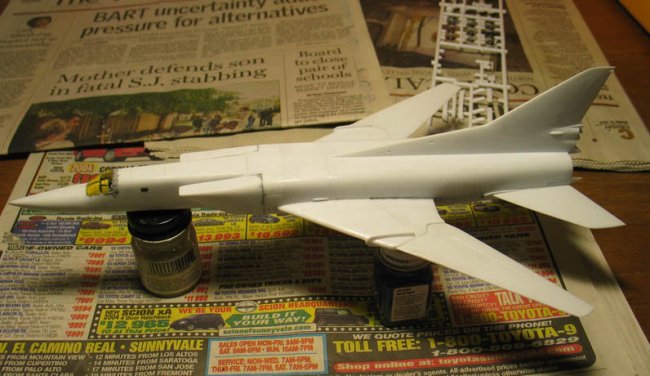
After all of
this, the model was primed for the painting process. The cockpit glass was first
masked with Micro Mask, but this system was very bad because it was really hard
to cut the right pieces. I then masked it with Tamiya Tape, which was much
easier, even though it took more time. I put Future on the mask before priming
to seal it in.
|
Click on
images below to see larger images
|
|

|

|
|
Painting:
Painting was
pretty simple for this model, as it always is for my military aircraft. I
started out with mixing 80% Tamiya Sky Grey with 20% Tamiya Flat White, and then
some thinner added. I sprayed that on with my Badger 250 airbrush, and waited
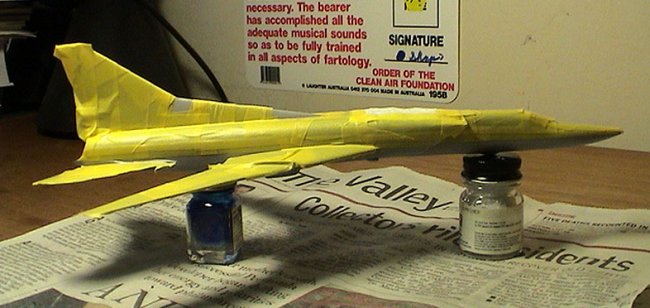
for it to dry. Then, I started masking for the bottom white. I had several
references to help me with this, and they surely did pay off. After masking the
whole top of the aircraft in masking tape, and the white areas in the tail, it
was time for painting. But before painting, I had to seal in the masking tape so
no paint would leak through. I did this by putting Future on the edges of the
masking tape, which was suggested by my good friend MadMike fro the OZ. I
sprayed on a mix of 90% Tamiya Flat White and 10% Thinner, since the paint was
already pretty milky. When I sprayed this on, I let it dry, and in 2 days I took
off the mask. I was just amazed!!!!! Every line was absolutely perfect! No leaks
or crooked lines! You guys seriously have to try this technique out!
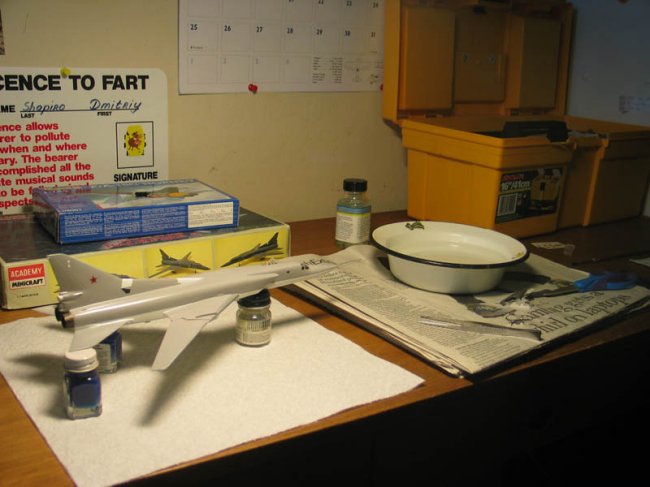
With
all of the major painting done, it was time for the small parts. The part on the
tail that seems black was painted with a mix of black and silver. I do not know
the percentage, but I just mixed it until I was satisfied with the color. The
silver on the tail was masked and painted with Tamiya Aluminum. The aluminum on
the front of the wings was painted with Tamiya Aluminum too.
|
Click on
images below to see larger images
|
|

|

|

|
This was just part
of the whole build. Look out for Part Two coming later on ARC.
Dmitriy
|
|