|
I would
like to begin by attributing the success of this build to Masa Narita.
Without his website's masterful solutions and, quite literally,
step-by-step descriptions of assembling this model, it would either have A)
ended up smashed to pieces, or B) been a poor example that never would have
found its way onto this website. Thanks
Masa!!! His website can be found at
www.naritafamily.com and I highly
recommend it anyone and everyone. His
1/32 F-14D can be found in the ARC gallery as well as on numerous other
websites.
|
Click on
images below to see larger images
|
|

|
 |
|
As
we all know, the Tomcat is on its way out and I was fortunate enough to see the
last Tomcat tac demo at NAS Oceana last September. I had been working on
this kit for quite a while prior to this airshow, but I really started slacking
and seeing the 'cats in action really got me going again. This model is
dedicated to the pilots of VF-31 who are on their last cruise with the famous
'King of the Flight Deck'. This particular aircraft, BuNo164600 was the
5th-to-last Tomcat ever built (back in '92) and served as the CAG for VF-31 from
the late 90s through Operation Iraqi Freedom. This Tomcat is quite
distinguished as having the traditional red twin fins and a gloss black radome
(US Navy F-14 Tomcat Units of OIF, Holmes, p7). Felix (on the tails) was
recently replaced with "NK". Anyway, onto the build.
Well,
there really isn’t that much that hasn’t been said about this kit, so I'll
just hit the highlights (and low points). Having
a lifelong love affair with the F-14, I always saw the Tamiya kit as the Holy
Grail of big Tomcat models, especially after being so disappointed with the
Revell renditions. I had heard bad,
bad things about this kit, but I was in denial until it arrived and I cracked the
box open.
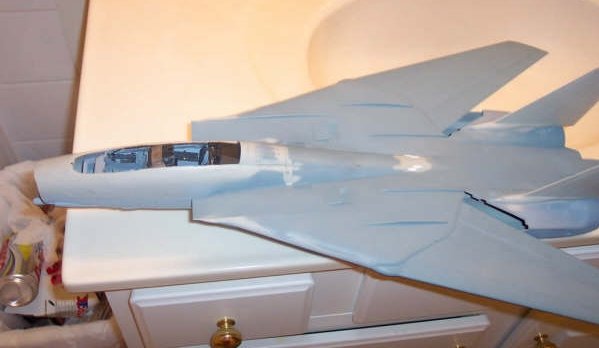
First
of all, the cockpit is a joke; decal panels might work for a 1/72, but come on!
Needless to say, the original cockpit (which even my wife had to laugh
at) went right out the window and was replaced with the oh-so-expensive Cutting
Edge kit. This cockpit is
fantastic, but does require a bit of convincing to get it into place.
It’s actually a bit off, but I won’t say anything again if you
don’t.
Secondly,
the panel lines on the upper and lower halves of the fuselage are raised.
Come on! Who knew that the
1980’s method of model fabrication was still in use?
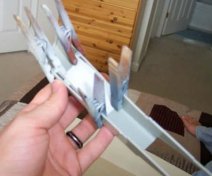
Anyway, rescribing the panel lines (many of which were just blatantly
wrong and had to be corrected using numerous references, Masa’s website being
first and foremost) took me quite a while, especially since this is only the
second kit I’ve ever rescribed (the 1/32 Hasegawa F-16 being the other, ugh!).
Well, in the end, it was worth it, but [expletive]!
|
Click on
images below to see larger images
|
|

|

|

|
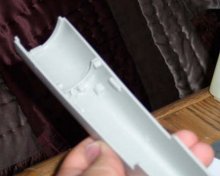
Lastly,
the air intakes – Good God! They
might fly for a 1/350 Tomcat, but not here.
Luckily, I was, again, saved by Masa’s most merciful and instructional
website. Using styrene sheets, the
intakes were scratch built and look great!
Unfortunately, digital camera is rather aged and picture
attempts all fell flat.
Anyway,
the updated weapons all went together like a dream, although a layer of thinned
Squadron putty had to be applied to the GBU-24s to simulate the coating that the
navy uses on their bombs. Anyway,
the ‘cat is all together and I’m in the process of paining her up real nice
(you all know how painting navy jets goes), so I’ll hopefully have part two of
this article up within the next few weeks.
Thanks for looking!
Eric
|
Click on
images below to see larger images
|
|

|

|
|
|